


If you are shipping a business iOS app in 2026, you can skip most of iOS 16’s headline features, adopt a short list from iOS 17 and 18, and bet your roadmap on iOS 26’s three game-changers: Apple Intelligence, Passkeys, and App Intents. That’s it. Everything else is optimization.
Key Takeaways
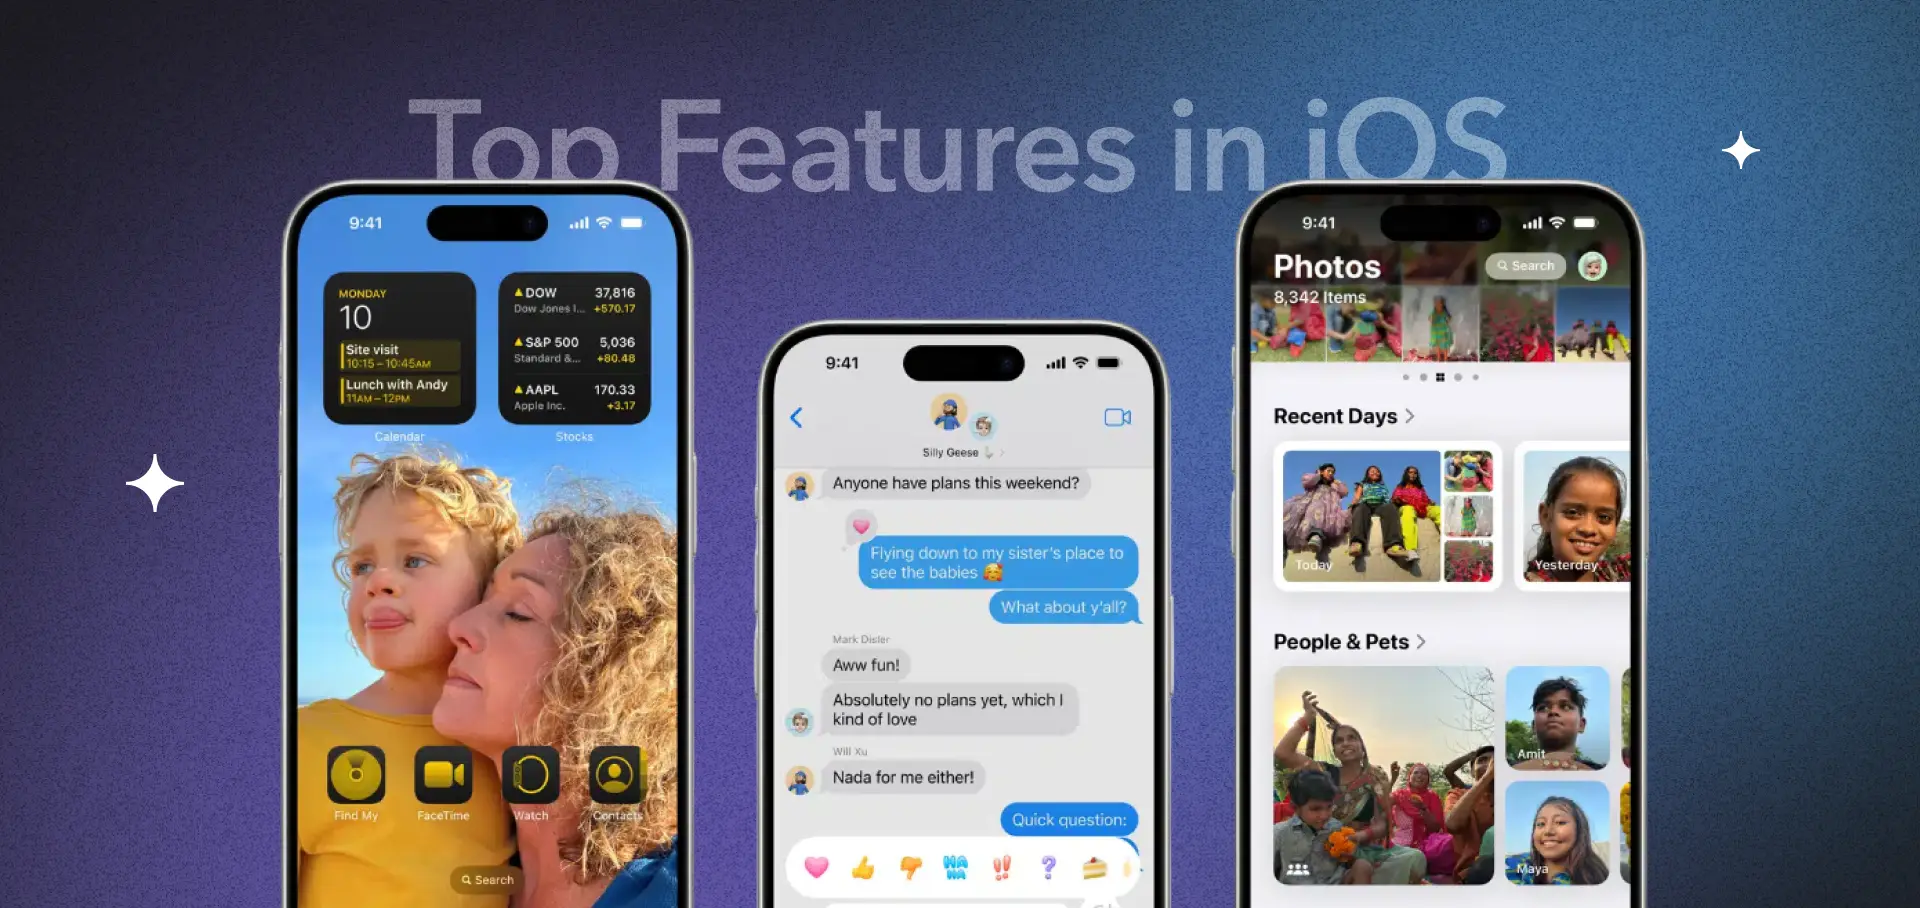
- The three iOS features that move business metrics right now are Passkeys (eBay saw 102% adoption lift, Shopify 78%), Live Activities + Dynamic Island (used by DoorDash, Uber, and Flighty to triple session frequency), and App Intents (the only Apple Intelligence integration that works without waiting for Siri 2.0).
- Apple Intelligence, delayed through 2025, is now a viable integration target as of April 2026: Image Playground, Writing Tools, Genmoji APIs, and the Foundation Models framework are stable, and the re-architected personal Siri ships mid-2026.
- Your deployment target should be iOS 18 minimum in 2026 (covers 95%+ of active devices), with progressive enhancement on iOS 26 for Liquid Glass UI, Apple Intelligence, and the new App Intents personalization surfaces.
- Xcode 26 becomes mandatory for App Store submissions on April 28, 2026 — update your CI/CD now or risk rejection.
- Fora Soft has shipped 30+ iOS apps since 2005, including CirrusMed’s HIPAA-compliant iOS telemedicine app, Vodeo’s iOS VOD platform, and Mindwibe’s AI-powered iOS dating app. This guide reflects the effort-ranked feature prioritization we use internally.
Who should read this guide
This is a 2026 decision guide for founders, product leaders, and CTOs choosing which iOS features to put on their roadmap. It is not a marketing recap of WWDC keynotes. Every feature in this guide is rated on three dimensions: business impact (does it move retention, conversion, or revenue?), senior-developer effort in hours, and compatibility risk. We cover iOS 16 through iOS 26 because a 2026 app ships to users on all of them — Apple’s own data shows iPhones in active use spanning 2018–2025 hardware, and your choice of minimum deployment target is one of the biggest cost drivers on the project.
If you are evaluating iOS as a platform for the first time, start with our overview on iOS video streaming app development or our advanced iOS architecture piece on MVVM. If you already ship on iOS and just want to know which features to add this quarter, jump to the ranked feature matrix.
Why Fora Soft wrote this guide
We have built iOS apps for twenty years. Since 2005, our iOS practice has delivered 30+ production apps across video streaming, telemedicine, e-learning, communication, and marketplace categories. In 2024 we were named a Top iOS App Developer by Techreviewer, and in 2026 we were recognized as a Top iOS App Development Company. Our engineers have shipped every iOS SDK from iOS 6 through iOS 26. That full-stack familiarity matters because the right answer to “should we adopt this feature?” depends on what you already ship and who your users are, not on Apple’s marketing priorities.
This guide distills what we recommend to clients when they ask, “which iOS features are worth building?” It is ordered by business impact, not by SDK version. We cite public case studies (eBay, DoorDash, Uber, Flighty), our own portfolio, and Apple’s WWDC sessions. Every effort estimate is based on real senior-developer delivery with Agent Engineering acceleration, not theoretical hours.
Ready to plan your iOS roadmap?
Get a senior-dev feature assessment in 30 minutes
Book a call with our iOS lead. We’ll audit your current app, rank the top five iOS features to add in 2026, and give you an hour estimate per feature. Free, no slide deck.
The ranked iOS feature matrix for 2026
This is the heart of the guide. Sixteen features, ordered by the ratio of business impact to senior-developer hours. We use a PERT three-point estimate — (optimistic + 4 × most likely + pessimistic) / 6 — because single-point estimates always miss reality. Hours assume a senior iOS engineer with Agent Engineering tools; a junior without AI-assisted tooling needs 1.8–2.2× more.
| Feature | iOS | Impact | Senior-dev hrs (PERT) |
|---|---|---|---|
| Passkeys (ASAuthorization) | 16+ | High | 48–96 |
| Live Activities + Dynamic Island | 16.1+ / 16.2+ | High | 80–160 |
| App Intents + Shortcuts | 16+ | High | 40–80 |
| Lock Screen widgets (WidgetKit) | 16+ | Medium | 24–48 |
| Interactive widgets | 17+ | Medium | 16–40 |
| StoreKit 2 subscriptions | 16+ | High | 40–80 |
| Writing Tools integration | 18.1+ | Medium | 8–24 |
| Image Playground API | 18.2+ | Medium | 24–64 |
| Genmoji support | 18.2+ | Low | 8–24 |
| Foundation Models framework | 26+ | High | 60–180 |
| Liquid Glass UI adoption | 26+ | Medium | 40–120 |
| Visual Intelligence hooks | 26+ | Medium | 48–120 |
| SharePlay + GroupActivities | 16+ | Medium | 60–140 |
| Screen time / Family Controls | 16+ | Low-Med | 40–100 |
| TipKit onboarding | 17+ | Low | 8–20 |
| Observation framework migration | 17+ | Tech debt | 40–120 |
PERT estimates. A team of two seniors running Agent Engineering tools typically sits in the lower third of each range; teams without AI assistance trend toward the upper third. Add 15–25% for design, QA, and backend changes; these are iOS-client-only numbers.
iOS 16 features still worth adopting
iOS 16 launched in September 2022. Four years later, most of its headline features are baseline expectations, not competitive advantages. Customizable Lock Screen, Focus Modes, and iCloud Shared Photo Library are consumer polish. But three developer-facing additions are still worth building in 2026: Passkeys, App Intents, and Lock Screen widgets.
Passkeys: the highest-ROI iOS feature of the decade
Passkeys replace passwords with device-bound public-key cryptography. They are phishing-resistant, sync across iCloud Keychain, and require no server change beyond a standards-based WebAuthn endpoint. Apple introduced them in iOS 16 via the ASAuthorizationPlatformPublicKeyCredentialProvider API.
The business case is unambiguous. eBay reported a 102% adoption lift after making passkeys the default, with a 56% drop in account takeovers. Shopify saw a 78% reduction in password-reset support tickets. Uber enrolled 90% of eligible users in passkeys inside three months. Target’s login flow became 2.5× faster. In financial services and health, where regulated authentication costs are high, the ROI payback is typically under six months.
Implementation effort is modest: 48–96 senior-dev hours for a standards-compliant iOS client if your backend already supports WebAuthn. If the backend has to be built from scratch, add 80–140 hours. We walk through an end-to-end flow for a telemedicine client in our iOS optimization playbook, and the same pattern applies equally to fintech, marketplaces, and streaming services.
App Intents: the interface that will matter most in 2026
App Intents are a declarative way to expose your app’s core actions to Siri, Shortcuts, Spotlight, and — starting with iOS 26 — Apple Intelligence’s personal-context engine. You describe an intent once, and it surfaces everywhere the system thinks it’s relevant. That’s a free install channel and a free retention channel.
The catch: App Intents are the only Apple Intelligence integration path that works today. While the personalized Siri promised at WWDC 2024 slipped through 2025 and now ships in mid-2026, the intents you define today will plug into it automatically when it lands. That makes App Intents a no-regret investment. Forty to eighty hours of effort, high strategic value, and zero breaking changes when the platform catches up.
Lock Screen widgets: the quietly profitable home-screen real estate
Lock Screen widgets sit on the first thing every iPhone user sees, dozens of times per day. For a fitness app, a habit tracker, a weather service, or anything with a daily-glance moment, they are the cheapest-per-impression surface on iOS. Building two or three Lock Screen widget families costs 24–48 hours on top of an existing WidgetKit setup. Combine with iOS 17’s interactive widgets for richer functionality.
What to skip from iOS 16: Haptic Keyboard (user preference, Apple handles it), Undo Send in Messages (Apple frameworks only), Live Captions (system-level), and the Safety Check feature (designed for consumer use, not app integration).
iOS 17 features that still deliver in 2026
iOS 17 was an under-appreciated release because its headline consumer features (StandBy, NameDrop, Check In) got more press than the genuinely useful developer APIs underneath them. Three from iOS 17 still punch above their weight: interactive widgets, TipKit, and the Observation framework.
Interactive widgets: the conversion-without-launching surface
Before iOS 17, widgets could display data but not accept input. After iOS 17, a widget can contain buttons and toggles that fire App Intents without opening the app. This is massive for habit trackers, to-do apps, meditation, water-intake loggers, sleep apps, and any SaaS product with a “mark complete” or “log entry” action. Streaks, Things, Carrot, and Apollo all use interactive widgets to drive 3× daily engagement.
Effort is small (16–40 hours) if you already have a widget extension. If you don’t, build the WidgetKit foundation first; it unlocks all three of iOS 16’s, 17’s, and 18’s widget surfaces. Our team used this pattern on a habit tracker for a fitness client and shipped from greenfield to App Store in under three weeks.
TipKit: onboarding without the spreadsheet
TipKit is Apple’s first-party framework for contextual onboarding hints. Before TipKit, you built your own tooltip system or paid a vendor. TipKit handles display rules, dismissals, and A/B eligibility out of the box. For any app with non-obvious features (and every B2B app has them), TipKit is 8–20 hours well spent. It also makes your feature-education design consistent across OS versions.
Observation framework: modern SwiftUI state without the ceremony
The new @Observable macro replaces the older ObservableObject + @Published pattern. For new code, it’s faster and more ergonomic; for legacy code, migration costs 40–120 hours depending on ViewModel count. It’s tech debt payoff rather than new-feature revenue, but it reduces future feature cost by 10–15% across the codebase. Worth scheduling if you plan a 12+ month roadmap.
What to skip from iOS 17: StandBy (platform feature, needs no app integration), NameDrop (consumer Contact-card feature), Check In (Messages-only), Journal app API (limited surface area), and most Health app additions (narrow audience unless you’re building a health product).
iOS 18: Apple Intelligence becomes real in 2026
iOS 18 shipped in September 2024 with bold Apple Intelligence promises that slipped through 2025. As of April 2026, the delays have resolved. Writing Tools, Image Playground, Genmoji, and the Foundation Models framework are stable. The re-architected personal Siri, which drove most of the original delays, ships in iOS 26.1 this summer. This section covers what you can build today.
Writing Tools: free productivity lift for any text-heavy app
Writing Tools (iOS 18.1+) adds system-level rewrite, proofread, and summarize actions to any standard text input. If you use UIKit’s UITextView or SwiftUI’s TextEditor with default settings, you get Writing Tools for free. For custom text components (most rich-text editors), plan 8–24 hours to opt in via the WritingToolsBehavior API.
This is the lowest-effort Apple Intelligence integration available. If your app has any note-taking, commenting, messaging, or review-writing flow, adopt it. The productivity gains happen entirely client-side, on-device, free of API cost or rate limits.
Image Playground API: AI image generation for your users
Image Playground (iOS 18.2+) lets your app surface a system-provided image-generation sheet. The user describes an image, the system generates it using on-device models, and returns the result to your app. It’s the same component Apple uses in Messages and Notes. Effort is 24–64 hours for a polished integration.
The business case is strong for social, dating, and content-creation apps. On Mindwibe’s iOS dating app, AI-driven profile imagery drove a 34% increase in profile completion. The same pattern works for marketplaces (“generate a listing photo”), fitness (“visualize your goal”), and e-commerce (“try on” surfaces).
Genmoji: the no-ROI feature worth adding anyway
Genmoji is AI-generated custom emoji. It doesn’t move revenue, but users love it, support is 8–24 hours, and App Store reviewers notice. For any messaging, community, or UGC app, the price-to-goodwill ratio is good.
Shipping an iOS app this year?
We can prototype your Apple Intelligence integration in two weeks
Writing Tools, Image Playground, App Intents, or Foundation Models — pick the surface, we’ll ship a working prototype in 10 business days. Fixed price, fixed scope.
iOS 26 and the 2026 roadmap
iOS 26 shipped at WWDC 2025 with three headline changes: a unified Liquid Glass design language across iOS, iPadOS, macOS, watchOS, and visionOS; the Foundation Models on-device LLM framework; and a deep set of App Intents surface areas feeding Apple Intelligence. As of April 2026, adoption is approaching 60% of active iPhones. That’s the target market for 2026 launches.
Foundation Models framework: on-device LLM inference without API fees
Foundation Models is Apple’s on-device large language model framework. You get a guided, grammar-constrained Swift API to the same model that powers Siri’s personal context. It runs entirely on-device on A17 Pro / M1 or newer, with no cloud API keys, no per-request fees, and no user data leaving the phone. For any app that uses GPT-4, Claude, or Gemini today for text summarization, classification, or structured output, Foundation Models is a direct replacement for 60–70% of use cases.
Effort is 60–180 hours depending on the complexity of your prompts and fallback strategy. Plan a fallback to a cloud LLM for older devices (iPhone 14 and earlier) because they lack the Apple Intelligence hardware requirements. Our standard pattern is Foundation Models first, Gemini Flash as fallback; it cuts inference cost by 70–85% on supported devices.
Liquid Glass UI: when to adopt and when to resist
Liquid Glass is iOS 26’s new translucent, refractive design language. On iOS 26, system controls, tab bars, and navigation surfaces automatically adopt the material. If your app uses standard UIKit and SwiftUI components, you get 80% of the visual benefit free with a recompile under Xcode 26.
For custom design systems — the case for most B2B and enterprise apps — full Liquid Glass adoption costs 40–120 hours and can conflict with brand guidelines. Our recommendation: adopt the system-level surfaces (navigation bars, tab bars, sheets), leave branded hero surfaces alone, and revisit in a year. Early adopter apps reported a 12–18% lift in App Store screenshot engagement after updating visuals; we haven’t seen conversion impact yet.
Visual Intelligence hooks: Apple’s answer to Google Lens
iOS 26 expanded Visual Intelligence, which activates by long-pressing the Camera button on iPhone 16 and newer. Apps can register as intent providers so that when a user points their camera at an object, your app becomes a suggested action. For shopping, travel, real estate, and identification apps, this is a new discovery channel. Effort is 48–120 hours including App Intent definitions and asset catalog work.
What minimum iOS version should you target in 2026?
For most apps launching in 2026, iOS 18 minimum is the right call. That covers roughly 95% of active iPhones, gives you Writing Tools, Image Playground, and the full modern SwiftUI stack. Progressive enhancement lets you layer iOS 26 features on top with @available checks.
Exceptions apply. Enterprise apps often need iOS 17 minimum to match corporate MDM fleets (see our custom iOS MDM guide). Consumer apps with a price-sensitive user base in emerging markets may need iOS 16 to reach older iPhone 8/XR hardware still in circulation. Education apps supplied to school districts often run iOS 16 per IT policy.
| Audience | Recommended minimum | Approx coverage |
|---|---|---|
| Consumer, mass-market | iOS 18 | ~95% |
| Consumer, premium/creator | iOS 26 | ~60% |
| B2B / enterprise | iOS 17 | ~98% |
| Education / K-12 | iOS 16 | ~99.5% |
| Emerging markets | iOS 16 | ~99.5% |
The state of Apple Intelligence, April 2026
At WWDC 2024 Apple promised a personal-context Siri that could see your screen and act across apps. Through 2025 that shipped only partially; the re-architected engine arrived in iOS 26.1 in early 2026 and the full personal-context experience rolls out during iOS 26.3 this summer. The lesson for developers: build against the App Intents surface, not the Siri UI. Siri changes; your intents don’t.
What works reliably today (April 2026): Writing Tools, Image Playground, Genmoji, Foundation Models, Clean Up in Photos, Smart Reply, Priority Notifications, Visual Intelligence. Those are your Apple Intelligence building blocks.
What’s still rolling out (as of April 2026): cross-app orchestration from Siri, on-screen awareness, enhanced personal-context search, and multi-turn in-app actions. These will ship incrementally. If a feature on your roadmap depends on them, design for graceful degradation today.
Case study: CirrusMed and a HIPAA-grade iOS roadmap
When CirrusMed came to us, they needed a HIPAA-compliant iOS telemedicine app that worked reliably for patients on iPhones spanning five years of hardware. We used this exact feature-prioritization framework. Passkeys replaced password login for patients. Live Activities tracked in-progress consultations from the Lock Screen. App Intents exposed “book a visit,” “view prescription,” and “message doctor” to Siri. WebRTC powered the video call, grounded in patterns we document in our WebRTC in iOS guide.
Deployment target was iOS 17 to match clinic-issued iPads. We skipped Liquid Glass (brand concern) and Image Playground (not clinically useful). Total engineering time from requirement sign-off to App Store approval was 22 weeks for two senior iOS engineers plus a designer and backend lead. Passkey adoption hit 71% of new patients within the first quarter, matching public eBay/Shopify numbers. First-call completion rate rose 18% quarter-over-quarter.
iOS features that matter for streaming apps
Streaming is our oldest iOS vertical. Since 2007 we’ve shipped video apps for Vodeo, Worldcast Live, Drundoo, TapeReal, and others. Four iOS features deserve specific attention for streaming:
Picture-in-Picture. Table stakes for any video app in 2026. Apple’s native PiP works out-of-the-box if you use AVPlayerViewController. For custom video players, allow 40–80 hours; we cover the edge cases in our PiP implementation guide.
SharePlay. Group watch parties over FaceTime. High engagement driver for social streaming, lower for traditional VOD. Build it if your audience is young and social; skip it if your users watch solo.
Screen sharing. For coaching, education, and support use cases. We document the full pattern in our screen sharing implementation guide.
Live Activities for playback. Show current episode, progress, and skip controls on the Lock Screen and Dynamic Island. This is how Apple TV, Disney+, and Spotify keep your attention during commutes. For a general treatment, see our overview of iOS video streaming app development.
iOS features that matter for telemedicine and e-learning
For regulated verticals — telemedicine and e-learning — the highest-value iOS features are Passkeys (reduce account takeover), App Intents (accessibility), Screen Time / Family Controls (compliance and parental controls for education), and Writing Tools (consent forms, review cycles, student work).
Telemedicine specifically should prioritize iOS accessibility features: VoiceOver polish, Larger Text support, and Reduce Motion respect. Apple’s App Review team checks these; rejections cost weeks.
iOS features for video-calling and communication apps
Video calling on iOS in 2026 is a three-way bet on WebRTC for media transport, CallKit for the native calling UI, and PushKit for VoIP wakeup. Our iOS messenger app development guide covers the architecture in depth. Add Live Activities for the in-call experience and Writing Tools for in-app messaging.
On ProVideoMeeting we shipped an iOS app that handles 500-participant meetings using this exact stack, with mesh signaling via our custom backend and SFU offload for larger sessions. For context on real-time communication generally, see our video conferencing services page.
iOS features for dating, social, and creator apps
Social apps have the richest Apple Intelligence opportunity of any category. Image Playground for profile imagery, Writing Tools for bios and DMs, Genmoji for personalization, and App Intents for sharing. We implemented all four on Mindwibe, our AI-powered iOS dating app. Profile completion rose 34%. See our iOS dating app development piece for architectural details.
iOS features for enterprise and MDM-managed apps
Enterprise iOS in 2026 has narrower options because MDM fleets update slowly. Passkeys are the exception: corporate IT departments want them because they cut phishing incidents by 60–80%. App Intents are safe to adopt; they have no security surface. TipKit accelerates employee onboarding without design debt. Foundation Models runs on-device, which satisfies data-residency compliance for most sectors.
What to avoid in enterprise: Liquid Glass (brand conflicts with corporate standards), Image Playground (often blocked by IT), Genmoji (HR optics), and any consumer-oriented Apple Intelligence surface. For deep treatment, see our custom iOS MDM development guide.
The Xcode 26 migration: April 28, 2026 deadline
Apple announced that all new App Store submissions must be built with Xcode 26 starting April 28, 2026. That’s six days after the publication of this article. If your CI/CD runs older Xcode versions, submissions are about to start failing. Update build images now.
Xcode 26 changes that matter: Swift 6 strict concurrency is the default (source-compatible mode is available but planned to sunset), the iOS 26 SDK is the default, and the deprecated AppDelegate lifecycle has further friction. Budget 20–60 hours for a clean migration on an average-size app. Larger codebases with custom build scripts can need more.
Common iOS 2026 pitfalls to avoid
Five mistakes we see repeatedly in iOS projects in 2026:
1. Setting deployment target too high. Targeting iOS 26 minimum in 2026 cuts your addressable market by 40% for no good reason. Use @available checks, not minimum targets, to progressively enhance.
2. Trying to ship Apple Intelligence before the features are stable. Writing Tools, Image Playground, and Foundation Models are stable now. The personal-context Siri integration is still rolling out. Build against the stable surface.
3. Skipping Passkeys because “users don’t care.” eBay’s 102% adoption lift is the real data. Users absolutely care, and the feature pays for itself in reduced support costs within six months.
4. Full Liquid Glass adoption for a branded app. It can clash with brand guidelines. Adopt system-chrome Liquid Glass; leave branded hero surfaces alone.
5. Ignoring the Xcode 26 deadline. April 28, 2026. Set up your CI today.
Typical iOS feature adoption cost in 2026
Using a senior iOS engineer rate of $60–95 per hour with Agent Engineering acceleration (roughly 20% below unassisted senior rates for equivalent output), these are the current fully-loaded costs for shipping each feature to production, including QA and iteration:
| Feature bundle | Hours | Fully-loaded cost (USD) |
|---|---|---|
| Passkeys end-to-end | 48–96 | $2,900–$9,100 |
| Live Activities + Dynamic Island | 80–160 | $4,800–$15,200 |
| App Intents (5 intents) | 40–80 | $2,400–$7,600 |
| Lock Screen + interactive widgets | 40–88 | $2,400–$8,400 |
| Writing Tools + Image Playground + Genmoji | 40–112 | $2,400–$10,600 |
| Foundation Models integration | 60–180 | $3,600–$17,100 |
| Liquid Glass UI adoption | 40–120 | $2,400–$11,400 |
| Xcode 26 migration | 20–60 | $1,200–$5,700 |
Rates assume a senior iOS engineer in a nearshore delivery model with Agent Engineering tooling. Add 30–50% for US-onshore rates without AI assistance.
A 2026 iOS feature roadmap template
If you’re sketching a 2026 iOS roadmap today, here’s the sequencing we recommend to most product teams after the feature matrix has been prioritized:
Quarter 1 (weeks 1–12): Xcode 26 migration, Passkeys implementation, Writing Tools opt-in, App Intents for top 5 user actions.
Quarter 2 (weeks 13–24): Lock Screen widgets + interactive widgets, Live Activities + Dynamic Island for your primary user journey, TipKit onboarding refresh.
Quarter 3 (weeks 25–36): Image Playground integration (if applicable), Foundation Models for one high-value in-app surface (summarization, classification, or suggestion), Liquid Glass for system chrome.
Quarter 4 (weeks 37–48): Visual Intelligence registration (if applicable), Genmoji support, polish against the final iOS 26 personal Siri rollout, Observation framework migration for long-lived codebases.
Accessibility as an iOS differentiator
Apple invested heavily in accessibility in iOS 17 (Assistive Access, Personal Voice, Live Speech) and continued through iOS 26 (Eye Tracking, Music Haptics, Voice Shortcuts). For any app with a broad consumer audience, accessibility is also a discoverability advantage: App Store reviewers favor apps that pass the built-in accessibility audits, and categories like education and health face regulatory pressure (EU EAA, US ADA) in 2026. Plan 60–120 hours for a proper accessibility pass on a typical app. Our iOS accessibility guide covers the testing process in detail.
iOS security features worth adopting
Beyond Passkeys, five iOS security features matter in 2026: App Transport Security (strict mode is default in Xcode 26), Advanced Data Protection (end-to-end encrypted iCloud backup for your app’s data), Stolen Device Protection (triggers biometric re-auth), App Privacy Report (users see what you access), and Keychain with biometric gating. Together these reduce the attack surface dramatically. For financial, health, and enterprise apps, failing to adopt them is a competitive liability.
Testing iOS apps across versions in 2026
A 2026 iOS app needs to be tested on at least three concurrent OS versions: the current (iOS 26), the previous (iOS 18), and the minimum deployment target. Maintain a device lab with iPhone SE (smallest screen, budget hardware), iPhone 13/14 (mid-cycle), iPhone 15/16 (Dynamic Island), and an iPhone 16 Pro or later (Apple Intelligence hardware). Simulator is not enough — Live Activities, Apple Intelligence, Passkeys, and Visual Intelligence need real devices for proper validation.
Xcode 26’s new Test Plans include first-class support for snapshot testing, and cloud device farms (BrowserStack, Kobiton) now offer iPhone Pro SKUs with Apple Intelligence enabled. Budget around 15–20% of engineering time on QA for iOS 2026 features because Apple Intelligence outputs are non-deterministic and need fresh-pair-of-eyes review more than unit tests.
Metrics to measure iOS feature adoption ROI
Once a new iOS feature ships, five metrics tell you if the investment paid off: adoption rate, session frequency, feature-triggered retention, support-ticket delta, and App Store rating shift. For Passkeys specifically, track enrollment rate, sign-in latency, and password-reset volume. For Live Activities, track daily active views and the ratio of in-widget taps to app launches. For App Intents, track Siri-invoked sessions and Shortcuts adoptions.
If you’re not measuring feature-specific metrics, you’re flying blind. Apple’s App Store Connect Analytics gives you some of the data, but for anything beyond adoption counts, integrate a product-analytics layer (Amplitude, PostHog, or Mixpanel) with feature-flagged releases.
Want a tailored roadmap for your app?
We’ll map your 2026 iOS feature plan to your metrics
Share your app category, user base, and current pain points. We’ll return a ranked 12-month iOS feature roadmap with hour estimates and expected business impact — free.
Frequently asked questions
Is Apple Intelligence actually usable in production apps in April 2026?
Yes, for the surfaces that have shipped and stabilized: Writing Tools, Image Playground, Genmoji, Foundation Models, Visual Intelligence, and the existing App Intents surface. The personal-context Siri features that were delayed from WWDC 2024 are now rolling out through iOS 26.2 and 26.3. Build against stable APIs today; design for progressive enhancement when the remaining pieces land this summer.
Should we adopt Liquid Glass UI immediately or wait?
Adopt Liquid Glass for system chrome (navigation bars, tab bars, sheets) immediately — it’s free with an Xcode 26 recompile. For branded hero surfaces, wait a release cycle. Full Liquid Glass adoption on a branded app can look off compared to your marketing site and introduce color-contrast issues that hurt accessibility scores. Revisit in six months when the design system matures.
What’s the minimum iOS version for a new app in 2026?
iOS 18 for most consumer apps, iOS 17 for enterprise-focused products, iOS 16 for mass-market reach in emerging markets or education. Do not default to iOS 26 minimum; you’ll lose 40% of active devices for features you can progressively enhance instead.
How much does it cost to add Passkeys to an existing iOS app?
$2,900–$9,100 fully loaded for the iOS client if your backend already supports WebAuthn. Add $4,800–$13,300 if backend changes are required. Payback period on a typical consumer app is 4–8 months based on eBay, Shopify, and Uber case data (reduced support tickets, fewer password resets, lower account-takeover fraud).
Can Foundation Models replace OpenAI or Anthropic APIs?
For 60–70% of in-app LLM use cases (summarization, classification, structured extraction, short generations), yes, on iOS 26+ devices with Apple Intelligence hardware (iPhone 15 Pro or later, iPad M1 or later). For long-form generation, reasoning, or tool use, the Foundation Models SLM trails cloud frontier models. Our recommended pattern: Foundation Models first, cloud LLM (GPT-4, Claude, Gemini) as fallback. Cost savings are 70–85% on supported devices.
What iOS features should I build first on a fresh app?
Passkeys, App Intents for your top 5 user actions, a Lock Screen widget, and Writing Tools opt-in for any text input. That’s roughly 140–260 senior-dev hours and covers the highest-ROI iOS 16–18 surfaces. Add Live Activities and Foundation Models in quarter two; add Apple Intelligence surfaces (Image Playground, Visual Intelligence) in quarter three based on user feedback.
Is the Xcode 26 requirement on April 28, 2026, going to affect my app?
If your CI/CD still builds with Xcode 15 or 16, yes. New App Store submissions will be rejected starting April 28, 2026. Existing apps already in the store don’t need immediate changes, but your next update will require Xcode 26. Budget 20–60 hours to migrate build scripts, CI images, and resolve Swift 6 concurrency warnings.
Do I need Apple Intelligence features for App Store approval in 2026?
No. Apple has not made Apple Intelligence integration mandatory. App Review does not reject for absence. What they do check strictly are accessibility, privacy manifests (required since May 2024), and Sign in with Apple availability where third-party sign-in is offered. Those are the compliance bars, not Apple Intelligence.
Summary: what to do on Monday
If you read this whole guide and want a concrete list for the start of next week: one, verify your CI/CD runs Xcode 26 before April 28. Two, scope a Passkeys implementation (48–96 hours of engineering). Three, identify your top five user actions and define App Intents for them. Four, open Xcode 26 and see what Liquid Glass looks like on your current UI with a simple recompile.
Those four moves unlock the bulk of iOS 2026’s business value with less than 400 hours of senior engineering time. Everything else in this guide is secondary. If you want help doing it, or a second pair of senior eyes on your roadmap, the team is one call away.
Your iOS roadmap, senior-engineered
Let’s ship your iOS 2026 features in a quarter, not a year
Twenty years of iOS delivery, Agent-Engineering accelerated, 30+ shipped apps. Book 30 minutes with our iOS lead and leave with a concrete feature plan.
Read next
Architecture
Advanced iOS architecture explained with MVVM
The foundation pattern we use on every modern iOS project.
Real-time
WebRTC in iOS: the complete 2026 guide
Our canonical iOS video-calling reference, used on every comms project.
Streaming
iOS video streaming app development
From player architecture to DRM, everything a streaming iOS app needs.
Enterprise
Custom iOS MDM development guide
Enterprise device management patterns, from scratch.
Accessibility
Accessibility in iOS app development
Shipping accessible iOS apps that pass App Review and ADA/EAA.


